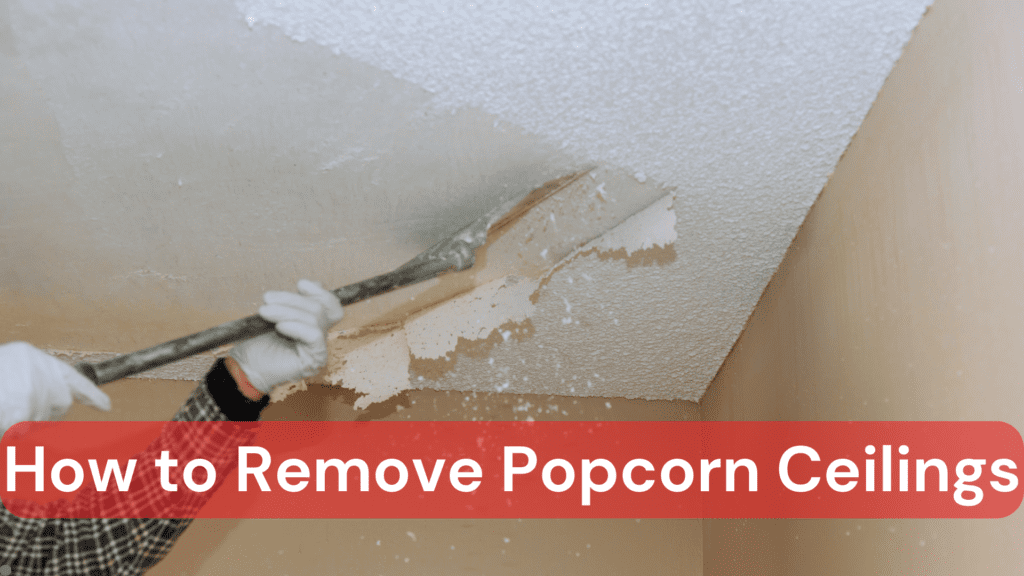
*Disclaimer: Although it’s possible to do this type of project yourself, we highly encourage getting a trained professional to come to your house to do the initial scrape and test of the material. The risk of being exposed to a carcinogen is not worth it.
Update your home by following simple steps on how to remove popcorn ceilings.

Table of contents
Imagine a home where your ceiling is as sleek and modern as the design inside—it’s time to say goodbye to bumpy, outdated popcorn ceilings! In this guide, you’ll learn exactly how to remove popcorn ceilings safely and transform your home’s look.
Removing popcorn ceilings is one of the most effective ways to update your interior. With over 25 years of trusted service across Canadian cities, Harding’s Painting has the expert touch to bring your ceiling dreams to life.
Why Removing Popcorn Ceilings is a Game Changer
Popcorn ceilings (also called acoustic or textured ceilings) became popular between the 1950s and 1980s. Builders loved them because they were inexpensive to install and hid imperfections in ceiling construction.
But times have changed. These textured ceilings now look dated compared to modern, clean ceiling designs. They collect dust, show stains easily, and are difficult to clean. And they’re not doing your home value any favors. As Apartment Therapy notes, modern builds rarely feature popcorn ceilings, emphasizing the shift to cleaner, smoother designs.
According to Renoviso, removing popcorn ceilings in homes can boost property values by up to $35,000.
The Benefits of Removing Popcorn Ceilings
Beyond the financial benefits, removing popcorn ceilings offers several advantages:
- Modern appearance that aligns with current design trends
- Better light reflection, making rooms feel brighter and larger
- Easier maintenance and cleaning
- Reduced dust collection and allergens
- Improved acoustics in your space
80% of North Americans prefer to buy homes that are move-in ready versus those needing work. Addressing outdated features like popcorn ceilings is a smart starting point if you’re preparing to sell.
Understanding the Risks and Safety Considerations
Before grabbing your scraper, there’s an important safety issue to address. Popcorn ceilings installed between the 1950s and early 1980s may contain 1-10% asbestos, which poses serious health risks when disturbed.
Before beginning any removal project, ensure proper asbestos testing is performed—see guidelines from Your Health Magazine. As House Digest emphasizes, “This is one activity where it is worth the expense of paying a professional so that the entire house is not cross-contaminated with airborne asbestos fibers.”
The health risks of improper asbestos handling can be severe and long-lasting. Professional removal ensures safety protocols are followed and materials are disposed of properly.
Step-by-Step Guide: How to Remove Popcorn Ceilings
If your ceiling is asbestos-free, here’s how to tackle the removal process:
Tools and Materials You’ll Need:
- Water sprayer
- 6-12 inch scraper
- Ladder
- Joint compound
- Sanding sponge
- Paint and primer
- Plastic sheets or drop cloths
- Safety gear (goggles, mask, gloves)
The Removal Process:
- Prepare the room by removing furniture or covering it with plastic sheeting. Cover floors completely.
- Turn off electricity to any ceiling fixtures and cover electrical outlets.
- Spray a small section of ceiling (about 4×4 feet) with water. Let it soak for 10-15 minutes to soften the texture.
- Gently scrape the softened texture using your scraper at a 30-degree angle. Work in small sections.
- Repair any damaged areas with joint compound after the ceiling is dry.
- Sand the ceiling smooth once repairs are dry.
- Prime and paint the ceiling for a finished look.
According to theE Helper Team, the process is straightforward but time-consuming. Unpainted popcorn texture typically takes 3-5 hours to remove, while painted popcorn can take 6-10 hours as it’s more resistant to water.
How to Remove Popcorn Ceilings: DIY vs. Professional Solutions
While DIY removal can save money, it comes with challenges:
DIY Considerations:
- Materials cost: $100-$300
- Tool rental: $50-$100/day if needed
- Physical demands: Hours and days on a ladder with arms raised
- Mess factor: Significant dust and debris
- Risk of ceiling damage if inexperienced
Professional Advantages:
- Expert assessment of ceiling condition and potential hazards
- Specialized equipment that ensures thorough, safe removal
- Significantly faster completion (often 1-2 days)
- Professional finishing techniques for flawless results
- Proper containment and disposal of potentially harmful materials
- Warranty protection on both workmanship and materials
Professional popcorn ceiling removal costs about $1-$2 per square foot, with total project costs between $900 and $3,000 for an average home.
Servicing Calgary, Kelowna, Edmonton, and Hamilton, our experts are ready to ensure your painting project is safe and flawlessly executed. Harding’s Painting brings over 25 years of experience to ensure your project is completed safely and beautifully. Their team handles everything from testing to removal to finishing, eliminating the stress and physical demands of DIY approaches.
Post-Removal Finishing Touches for a Stunning Interior
After removing the popcorn texture, you have several finishing options:
Smooth Finish
The most popular modern option involves skimming the surface with joint compound, sanding (start with 60-80 grit, finish with 180-220 grit), then priming and painting. This clean look maximizes ceiling height and complements any décor style.
Alternative Textures
If you want some texture but not the dated popcorn look, consider:
- Knockdown texture: Subtle and contemporary
- Orange peel texture: Light texture that hides imperfections
- Skip trowel finish: Adds Mediterranean flair
Our professional texturing services team can help you choose and apply the perfect finish for your home’s style.
Budgeting and Renovation Planning
When budgeting for popcorn ceiling removal, consider these factors during renovations:
- Square footage of the area
- Ceiling height and accessibility
- Whether asbestos testing/removal is needed
- Type of finish desired after removal
- Whether painting is included
While professional services cost more upfront, they often provide better value through:
- Faster completion times
- Higher quality results
- Reduced risk of costly mistakes
- Proper handling of potential hazards
For accurate pricing tailored to your specific project, request a quote from Harding’s Painting. Their team can assess your needs and provide detailed cost information.
Final Thoughts: Elevate Your Home with a Modern Ceiling Transformation
Removing popcorn ceilings transforms your home’s interior from dated to modern, dramatically changing how your space looks and feels while adding significant value to your property.
The combination of increased property value, improved aesthetics, and easier maintenance makes ceiling updates a smart investment. But the physical demands, potential hazards, and importance of proper finishing make this an ideal job for experienced professionals. Upgrade your home’s value and style—don’t wait—contact Harding’s Painting today and take the first step toward a safer, more beautiful ceiling transformation!


